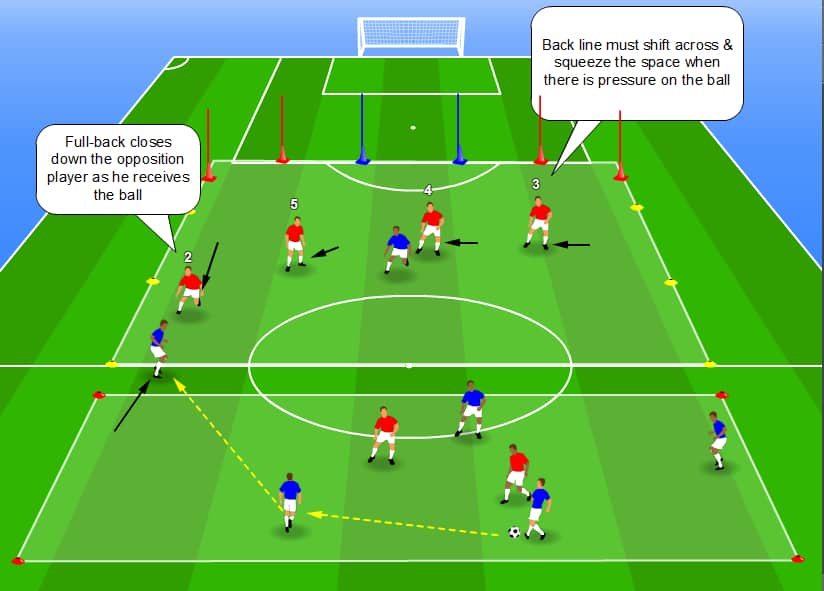
Set-Up
The red zone has a 5v2 or 5v3 in favour of the blues and in the yellow zone, there is a 4v1 in favour of the reds.
The 4 red players in the yellow zone are the defensive line, in this case a back 4 (adapt it to your formation).
Description

Four blues must make X number of passes befor they can enter the yellow square to attack. A blue player is allowed to recieve the ball in the nuetral space (between the red and yellow zone) but is not allowed to stand in the nuetral space and wait for the ball. The player must move into the space as the pass is being made (to simulate the off-side rule).
Red back four must shift from side to side whilst also deciding when to press and when to drop in order to provide cover so that the ball cannot be played in behined.
When playing possession, the blues can score 10 points if they can make a long pass between the mini goals (blue & red poles).

Key Devoloping Aspects:
- Communication
- Decision making (when to step up & when to drop)
- Body shape of the defenders
- Shifting across as a unit
- Maintaing correct spaces between the back four
Progression:
Take away the mini goals and use the large goals with a keeper. Also, there is a Nº 6 added for the red team that begins in the small yellow zone with the aim of blocking passes into the feet of the striker.

